It’s finally here! After what it seems like forever the new iteration of the Canon 7D has been finally announced at the 2014 Photokina and it is available for pre-orders!
Quick specs: 10 frames per second, brand new 20.2 Mega Pixel APS-C Sensor, ISO from 100 to 16000 (Expandable to 51200), 65 cross-type Auto focus Points, 1080p HD Video (no 4k!) , Built-In GPS tagging (it even records which direction the camera is pointing!), internal compass customizable viewfinder, built in intervalometer, Weather Sealed Dual Card Slots (FC and SD).
It’s finally here! After what it seems like forever the new iteration of the Canon 7D has been finally announced at the 2014 Photokina at is available for pre-orders!
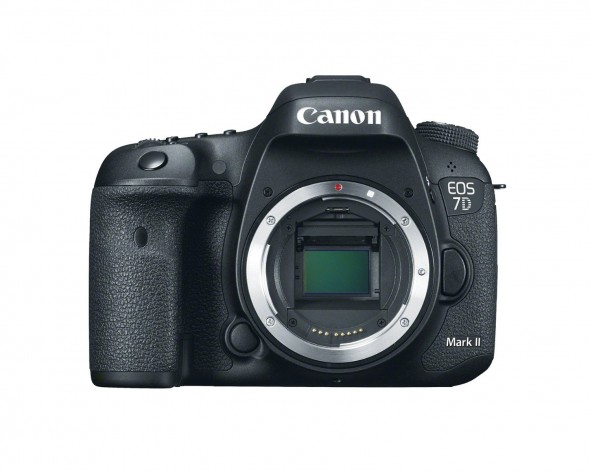
The Canon EOS 7D Mark II digital SLR camera is designed to meet the demands of photographers and videographers who want a camera that can provide a wide range of artistic opportunities. With a winning combination of cutting-edge operations and a robust, ergonomic design, it is optimized to make even the most challenging photography simple and easy. The EOS 7D Mark II features a refined APS-C sized 20.2 Megapixel CMOS sensor with Dual DIGIC 6 Image Processors for gorgeous imagery. It shoots up to 10 frames per second at ISOs ranging from 100–16000 (expandable to H1: 25600, H2: 51200), has a 65-point* all cross-type AF system and features Canon’s amazing Dual Pixel CMOS AF for brilliant Live-View AF. It has dual card slots for both CF and SD cards, USB 3.0 connectivity and even has built-in GPS** for easy location tagging, automatically. Compatible with an ever-expanding collection of EF and EF-S lenses plus a host of EOS accessories, the EOS 7D Mark II is an ideal tool for creative and ambitious photography.
* The number of available AF points, and whether single line or cross-type, varies depending on the lens.
** In certain countries and regions, the use of GPS may be restricted. Therefore be sure to use GPS in accordance with the laws and regulations of your country or region. Be particularly careful when traveling outside your home country. As a signal is received from GPS satellites, take sufficient measures when using in locations where the use of electronics is regulated.
Superlative Sensor for Gorgeous Images
20.2 Megapixel CMOS (APS-C) sensor and ISO 100–16000
The EOS 7D Mark II has a newly designed 20.2 Megapixel sensor that delivers high-resolution image files with stunning detail and impressive clarity. Optimized for low-light shooting, the EOS 7D Mark II’s sensor captures images at up to ISO 16000 (expandable to H1: 25600, H2: 51200) with remarkably low noise, thanks to its improved, higher sensitivity design. Phenomenal for stills, the EOS 7D Mark II’s sensor is equally up to the task for movies, delivering Full HD capture even at rates of up to 60p.
Dual DIGIC 6 Image Processors
The EOS 7D Mark II’s sensor works seamlessly with its Dual DIGIC 6 Image Processors for advanced image processing across the board. These image processors help the EOS 7D Mark II capture up to 1090 JPEG, 31 RAW, and 19 RAW + JPEG shots in a single burst for amazing action photography. Further, they enable the camera’s powerful image processing on-the-fly: lens aberration, variances in peripheral illumination and image distortion can all be corrected in real time thanks to the EOS 7D Mark II’s Dual DIGIC 6 Image Processors.
Speed Improvements Across the Board
7D Mark II
High speed continuous shooting up to 10.0 fps allows you to capture fast action
With a new, rugged shutter designed for 200,000 cycles, the EOS 7D Mark II can shoot up to 10 frames per second to capture all the action. With super quick AF and exposure systems complementing the shutter’s 55 msec shutter release time lag, the EOS 7D Mark II is tailored to meet and even exceed the speed of the action. Refined mechanics like a newly designed, more efficient shutter-drive motor and a vibration dampened mirror drive mean impressive performance for high caliber image quality, fast.
Sophisticated Mirror Control System
The EOS 7D Mark II camera employs an advanced mirror vibration control technology that enables the camera to support its speedy, continuous shooting capabilities while ensuring great image quality. The system uses a motor to help reduce the vibrations caused by high-speed shooting. By reducing the vibrations, the camera can achieve accurate and precise autofocus to provide steady and clear action shots at up to 10.0 frames per second.
Brilliant, Speedy AF Tracking
65-point* all cross-type AF system for high-performance, accurate subject tracking with EV -3 sensitivity (center point) for focusing in extreme low-light conditions
An EOS first, the EOS 7D Mark II features 65 all cross-type AF points* for high precision AF at remarkable speed. Cross-type AF points ensure stable AF that is not influenced by the subject’s shape or color. On the EOS 7D Mark II, the AF points are spread over a wide area of the frame, enabling faster AF, wherever the subject lies. With a central dual cross-type AF point of f/2.8, AF is enhanced with lenses faster than f/2.8. And thanks to this new system, AF is possible even in dim lighting as low as EV-3.
* The number of available AF points, and whether single line or cross-type, varies depending on the lens.
7D Mark II
Achieve Impressive AF During Video Capture
Canon’s innovative Dual Pixel CMOS AF enables you to shoot video like a camcorder with smooth, fast, and accurate autofocus and lets you enjoy instant and precise autofocus even when shooting stills
The EOS 7D Mark II features Canon’s revolutionary Dual Pixel CMOS AF, a milestone in AF speed and accuracy that unlocks the potential of Live View shooting. This advanced technology has truly changed what is possible with a DSLR camera.
Dual Pixel CMOS AF involves a sophisticated rethinking of the CMOS sensor. Traditionally, image sensors have one photodiode per pixel for recording, but the CMOS sensor on the EOS 7D Mark II has two photodiodes per pixel, 40 million in total, enabling each pixel on the sensor to both perform phase-difference detection autofocus and capture light. With phase-difference detection AF, autofocus is achieved quickly and easily on the camera. This unique AF system enables autofocus on approximately 80% of the image plane, vertically and horizontally, and helps ensure virtually no loss in image quality.
The benefits of Dual Pixel CMOS AF are clearly evident in Live View and video shooting, where the EOS 7D Mark II achieves natural, precise focus very quickly, even when switching between subjects. And, combined with the predictive power of Movie Servo AF, subjects in motion are smoothly and consistently tracked – once focus is locked, the EOS 7D Mark II holds on! Plus, with the shallow depth-of-field afforded by EOS optics, video gains a brilliant, cinematic ambience lacking when shooting video with many other Digital SLRs.
HD Quality, EOS Performance
Stunning Full HD video with custom Movie Servo AF (speed and sensitivity) for continuous focus tracking of moving subjects, multiple frame rates including Full HD recording at 60p in MOV and MP4 formats and uncompressed HDMI out
While offering performance improvements across the board for still photography, the EOS 7D Mark II is also an incredibly capable HD movie camera. Taking advantage of its Dual Pixel CMOS AF capabilities, the EOS 7D Mark II has customizable Movie Servo AF options: not only can AF location be defined, AF speed and tracking intervals can be specified too, for fluid, smooth focus transitions. The EOS 7D Mark II delivers refined and detailed image quality with Full HD 60P recording at ISO values up to 16000, has an HDMI output and records to both SD and CF cards for versatility and security during important shoots.
Comprehensive Information, Right in the Viewfinder
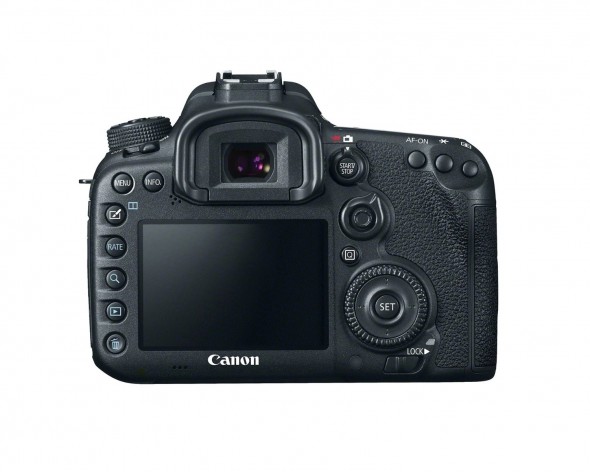
Intelligent Viewfinder II provides approximately 100% field of view for shooting ease
The EOS 7D Mark II’s Intelligent Viewfinder II makes it easy to both shoot, change and confirm camera settings and shooting modes all without looking away from the viewfinder. Displaying approximately 100% of the composition, the viewfinder can show settings like shooting mode, exposure level, white balance, drive mode, AF operation, metering mode, recording format, even an electronic level and more. All of this information can be displayed by or superimposed easily over the image for review while shooting, and multiple views are customizable through the EOS 7D Mark II’s simple user interface.
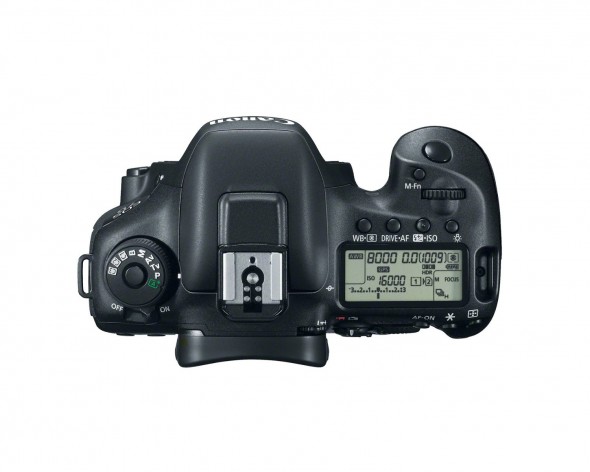
Specialty Controls, Built Right In
Improved custom controls and built-in intervalometer and bulb timer for expanded creativity
An EOS first, the EOS 7D Mark II offers time-lapse fixed-point shooting and long exposures without the need for a remote control. The EOS 7D Mark II’s interval timer takes from 1 to 99 shots at preselected intervals, ideal for shooting flowers as they bloom or clouds drifting through the sky. Its built-in bulb timer keeps the shutter open for a designated amount of time, perfect for night photography, or to capture the flow of traffic on a street corner.
Built to Perform
Magnesium alloy body with shutter durability up to 200,000 cycles and enhanced dust and weather resistance
The EOS 7D Mark II is constructed of the highest quality materials, and to exacting standards that ensure unfettered performance at all times. For example, the shutter can shoot at speeds up to 1/8000 sec. for up to 200,000 cycles, the chassis is built of lightweight and rigid magnesium, and the camera’s seals are built to resist water and dust. This combination makes the EOS 7D Mark II ready for almost anything.
Speed and Accuracy with Intelligent Subject Recognition and Analysis
EOS Scene Detection System features a new 150,000-pixel RGB+IR Metering Sensor for improved precision
The EOS 7D Mark II has an amazing iSA Intelligent Subject Analysis system that employs an independent RGB light sensor with approximately 150,000-pixel resolution. This sensor enables Canon’s intelligent Tracking and Recognition system (iTR AF) that detects and tracks subjects, automatically switching the AF point to optimize tracking. With new tracking algorithms tailored to recognize faces and colors, this system serves as a brilliant foundation to the EOS 7D Mark II’s AF system.
Extraordinary GPS, Built-in
Built-in GPS* Receiver provides a digital compass, records location information (longitude, latitude, elevation and universal coordinated time (UTC)) as EXIF information for geotagging images when shooting
Ideal for travel or nature photography, the EOS 7D Mark II’s built-in GPS* can record longitude, latitude and altitude data as EXIF data, can track movement at set intervals with its logging function, and can even set the camera’s internal clock to local time! When using the logger function on a computer, you will see the exact route you travelled, and the map will show you where and when you took each image.
* In certain countries and regions, the use of GPS may be restricted. Therefore be sure to use GPS in accordance with the laws and regulations of your country or region. Be particularly careful when traveling outside your home country. As a signal is received from GPS satellites, take sufficient measures when using in locations where the use of electronics is regulated.
Sharp and Clear Viewing
3.0-inch Clear View II LCD monitor (approximately 1,040,000 dots) for bright and clear viewing
The EOS 7D Mark II comes with a 3.0-inch Clear View II LCD monitor for shooting videos and stills. Displaying fine detail (at approximately 1.04 million dots), this screen is perfect for composing and reviewing images. Thanks to a solid construction between the monitor’s resin-coated cover and the liquid crystal display, reflections are minimized, and the display can be viewed with reduced glare. The LCD’s surface is treated with a smudge-resistant coating to minimize fingerprints and maintain a bright, clear image display.
Additional Features
Anti-flicker shooting
The EOS 7D Mark II features a new flicker detection system that not only alerts the user in the viewfinder, but with the camera’s Anti-Flicker Shooting function can compensate for flickering light sources, taking shots only at peak light volume. This feature is useful for minimizing disparities in color and exposure, especially during continuous shooting in sub-optimal lighting situations.
In-camera lens aberration corrections
To help photographers with achieving high quality images, the EOS 7D Mark II corrects image distortions like peripheral illumination, chromatic aberration and distortion, in-camera, as the image is recorded. When shooting in Live View mode, the results of distortion can even be monitored in real time through the EOS 7D Mark II’s Image Simulation Function.
USB 3.0
The EOS 7D Mark II features a USB 3.0 digital terminal for fast transfer to PCs and printers, plus offers connectivity to Canon’s WFT-E7 (Version 2) for wireless transfer and Wi-Fi® compatibility.
NOTE: For connecting an interface cable to the USB 3.0 terminal, a cable protector is included with the EOS 7D Mark II, and must be used at all times to protect the camera’s circuit board.
It’s finally here! After what it seems like forever the new iteration of the Canon 7D has been finally announced at the 2014 Photokina and it is available for pre-orders!


 but focused on the foreground instead.")
 Then with a black marker cover both sides of the cardboard.")


