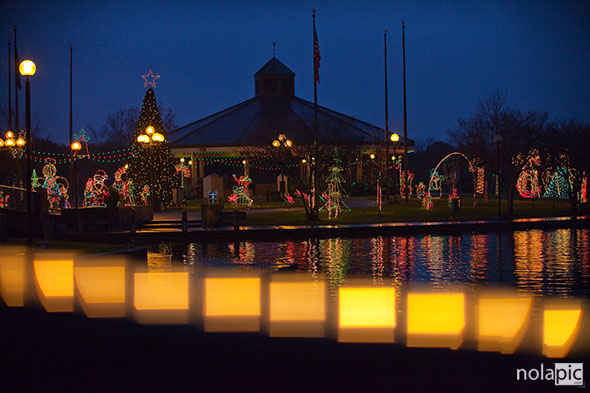
From Wikipedia: In photography, bokeh is the blur,or the aesthetic quality of the blur, in out-of-focus areas of an image, or “the way the lens renders out-of-focus points of light”. Differences in and shape cause some lens designs to blur the image in a way that is pleasing to the eye, while others produce blurring that is unpleasant or distracting— “good” or “bad” bokeh, respectively. Bokeh occurs for parts of the scene that lie outside the depth of field. Photographers sometimes deliberately use a shallow focus technique to create images with prominent out-of-focus.
What lenses are best for a good bokeh? A large aperture lens with a fast or very fast aperture (smaller numbers=larger maximum aperture) would be necessary so a lens with a maximum aperture of 1.8 or 1.4 will be very good, I use most of times a Canon EF 85mm f1.2L II USM, which is indeed super fast and bright but again 1.4 or 1.8 is good already and it won’t break your bank account!
Bokeh, bokeh shapes and boke filters:
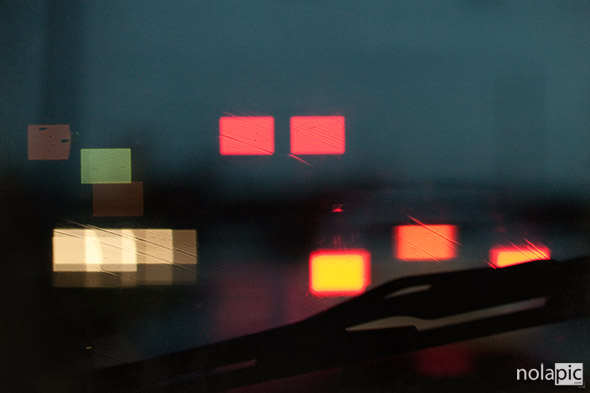
Recently, photographers have found how to exploit the shape of the bokeh by creating a simple mask out of card with the shape that the photographer wishes the bokeh to be, and placing it over the lens. Common shapes are stars and hearts, but it is possible to create it with almost any shape imagined.
After owning that fast lens ( and a camera..DUH!) you will need the following:
- Spare Camera lens cap to fit the size of the lens you will be using to do bokeh shots with
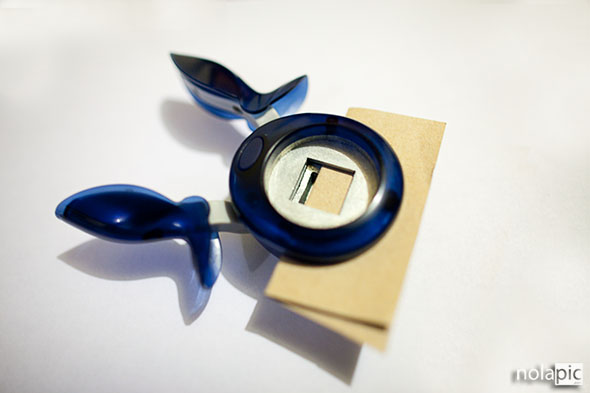
- Squeeze paper Punch (pictured here is a 3/4″ x 3/4″ square puncher)
- One thin sheet of black carboard
- Knife
- Candle
- Tape or glue
- Black Marker (if using a light color cardboard)
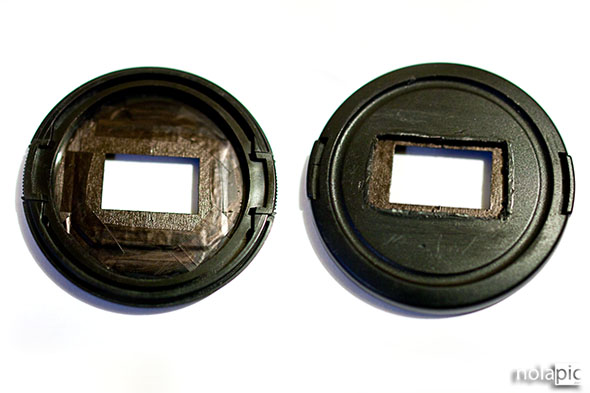
Light up a candle and after your knife is super HOT cut the rectangular shape in your lens cape roughfly in the middle of the cap. Don’t worry if it’s not super straight or super smooth, since the cardboard mask that you have previously made with the puncher is what is gonna give you the clean bokeh edges that you want. Do not try to cut the bokeh shape/mask with scissors or an exacto knife, otherwise your bokeh will look fuzzy and imperfect (not what we want). All you need to worry is that the cut in the cap will be fairly large and larger than your actual carboard mask with the bokeh shape. The puncher shown here has a hole of 3/4″ x 3/4″. Since its hole is square and I wanted a rectangular bokeh, I folded my carborad in half , so my cutout shape will be rectangular.
Do keep in mind that the smaller the bokeh mask hole you ‘ll make, the less the light it’s going to get to your lens, forcing you to either:
- Shoot with a higher ISO and therefore getting a grainier (more noise) picture
- Use a tripod or even worse get a blurry shot instead
After you cut the lens cap sand it off and make smooth on the inside (the side facing the lens) so you can glue your bokeh mask in there, you really only have to worry about placing the bokeh perfectly leveled, since you are gonna be able to rotate the lens cap and make it horizontal as you please, once your bokeh “filter” is on the camera.
Last but not least, do not forget that to get the most evident bokeh you’ll always need to keep these 3 very simple rules in mind and try to apply all of them when shooting for bokeh, and you will become a bokeh king like myself! 🙂
- Use the brightest lens you have and use it wide open (with the smallest numer, set to that number) 2.0, or 1.8, or even 1.4
- Stay as close as possible to the subject, as close as your lens allows you to focus that is!
- Try to keep your subject as far as possible from the highlights in the background that will become your bokeh, move the subject, when possible, further for the background, or position yourself somewhere else so the background will be further from your subject.


latteaddict
Hi Alfonso, thanks for the tips on making a bokeh attachment. I checked out your link to bokeh addiction. Love the street scene where you walked for hours wet. It was well worth it!
Pompo
You’re very welcome…Keep in mind that you really can use any shape in your custom made bokeh filter, but it’s important to use a puncher so the cut will be sharp.
Thanks so much for your very kind words!!
Jose
Hey Pompo,just stumbled on your site here after searching for how to make a custom Bokeh filter. I have somewhat of a stupid question, I understand that Bokeh is the blur in a photograph, but are there allready lenses or filters that allready come with Bokeh? Also, I own a Canon Rebel XS, with just the stock lens, which allows me to go down to F3.5, Do you think that would be large enough to support bokeh without going to lower shutter speeds or higher ISOs in say the afternoon, though obviously lighting conditions will make the biggest impact. There’s a photographer I saw who’s photos of models were very sharp, but within a couple of feet behind the model the background was already very blurry. So once again, silly question, but do you think that by using Bokeh I can reduce the depth of field more so as to be able to photograph a subject and have a very blurry background?
Pompo
@ Jose
Bokeh is the aesthetic quality of the blur, and a good ones (IMHO) depends on its shape and degree of blurriness.
You can control the quantity of blurriness by using the brightest lens possible wide open AND focusing by standing as close as possible to your subject, while the background from the subject is at least few yards away. I pay close attention to the distance from my subject to background, because if it’s too close, the bokeh won’t be so effective, and if it’s instead too far it will be too soft.
In order to get a good bokeh, I also pay close attention to what the background looks like and not just its distance from my subject.
The quality (or shape) of the blur is due to the lens used. The more a lens aperture approximates a round opening, the nicer the blur. With your lens of 3.5 max opening you can try to shoot in aperture priority at 3.5, stay as close as possible to your subject and move around to place a pleasant background and see what it looks like, but you will be probably better off with a simple and inexpensive 50 f/ 1.8 or 1.4 .
The step by step tutorial here is to change just the shape of bokeh, with a homemade bokeh “filter” or mask, but you still a bright lens to achieve it or the quantity of blurriness won’t be a lot. Hope it helps! Thanks 🙂
Jose
Yes it helped a lot! Thanks for helping me understand that concept. Basically from what I’ve understood is that the quantity of blurriness is directly affected by the size of the aperture and not by the bokeh filter.
Btw, the photo named “New Orleans Streetcar” looks like a miniature. Very cool. I would’ve guessed you used a tilt-shift lens before,but I suppose that degree of bokeh can be achieved with a very bright/fast lens?
Pompo
Greta! Also keep in mind that if with a super bright lens wide open you would focus instead of a few feet away from you to a subject that is say… 30 yards away , the bokeh would be very minimal.
That pic ” streetcar” is done hand holding the lens away from the body “freelensing”.
Jose
Oh wow. I wasnt aware of that technique. But after reading about it, it doesnt seem too safe to do while raining… or dust concerns lol. You get a similar effect to tilt-shift without the lens, very cool though.
Koko
hi,nice effect 😀
but a small question. when u cut a shape out and put it on the lens, wont it be like ur looking through a keyhole in the shape of a heart?
or maybe its my camera.:| im using the canonsx20is, is it possible with this camera?
thanks
Pompo
@Koko
When you cut out a bokeh shape it is not like looking through a keyhole, because the mask is so close to your lens that it almost becomes part of it. Make sure you shoot in Aperture priority at the widest setting (smaller aperture number), focus to anything like a coffee cup or a vase as CLOSE as POSSIBLE and place a candle or a light far away, that flame from that candle should show as the bokeh shape that you cut. The brigher the lens, he closer you focus to your subject, and the further the highlight (candle etc) the stronger the effect will be. I don’t see why the Canon x20is would not work! 🙂
Kelsey-Mae
Hello! I was wondering if it is possible to do this with any camera. I really want to do this but I don’t have enough money to by such a big camera and lens.
I own a Kodak EasyShare Z1285 HD camera, any way you can help me out?
<3,
Kelsey-Mae.
Pompo
@Kelsey I’m afraid you may not be able to do it with Kodak EasyShare Z1285…I’m not that familiar with that camera, does it have a bright and fast lens at least 2.8 and can you shoot in aperture priority?
Lisa Jurrens
Hi – I just LOVE this technique and have been excited to try it. I have seen Do-It-Yourself technique tutorials before but never one using a spare lens cap to hold your bokeh shape cut-out. Is the cut out in the lens cap just done to let the shape of your cardstock cut out show through but hold it securely? I think I am asking, can I cut a more rounded shape that will accommodate different bokeh cut-out shapes that I can switch out? I just LOVE this idea – it seems the most portable and easy to keep in your camera bag! I never thought of using a spare lens cap like that. Every other set of directions I have seen have you creating a “holder” that fits to the outside of your lens and seems like one scrunch in the camera bag would destroy it!
Thanks for this great idea!
Lisa J.
Pompo
Yes Lisa you can indeed cut a more rounded shape since the cut IS INDEED to let the card with the shape show through and align it in the middle. What I like about the lens cap is that you can rotate it for vertical shots too and at any angle you need it…have fun!
nadine
great idea, you inspired me to come up with an idea for a bokeh lens cap where i can easily change the shapes. works great.